This ingenious script saves you many mouse clicks and gives you better access to the settings of the baseline grid.
Surely you know all about the baseline grid in InDesign.
When you see this script, ask yourself why Adobe makes access to the baseline grid settings so complicated.
Take a look and be happy! 😍
In a nutshell:
One window - all options at your fingertips
You will always see the following elements in the script window:
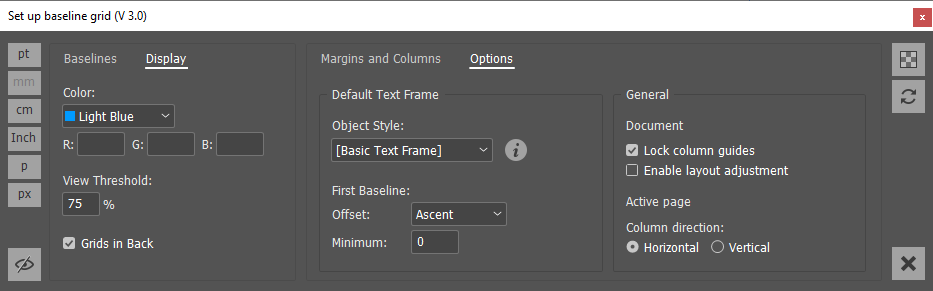
On the left-hand side , you can set the unit of measurement in which you want to set the baseline grid. Simply change the unit of measurement; InDesign will convert the values for you. You can hide and show the baseline grid using the “Eye” symbol.
On the right-hand side, you can use the checkered symbol to make the script window transparent. A brilliant idea if the window is in your way, without having to close it. If the changed settings are not implemented by InDesign, click the round double arrow to update the display.
Baselines
Here you can set the document baseline grid according to your requirements. The six symbols are explained in the tooltip.
Margins and Columns
In addition to the settings of the baseline rater, you can also set the bars and columns of your document.
With transfer to sample page
Note that you can use the “Sample page” button to transfer the current settings to a sample page! How great is that? You can test, try out and check the settings on a page with objects, text frames, image frames, etc. And if you like them, transfer them to a sample page!
Display
Set your desired color and the threshold value herefrom when the baseline grid should be displayed. In contrast to the standard settings in the InDesign default settings, the changes are immediately visible and implemented in the document.
Options
Here you can make settings for your object format directly. Clear and direct! GREAT!