Install fonts

With this script you can organize customer and project fonts well in InDesign

Why do you need font management in InDesign?

Sure, everyone already has font management.

Either all fonts of all customers and all projects are simply in the system or you have a font management program.

Or you can reinvent the wheel with every project!

With the script “Install Fonts” you can create order in your projects!

Often you will find this situation in files

You have created a folder for each of your customers that contains all the customer’s fontsOr, if that’s too many fonts, you have individual folders for the projects which contain the fonts. Nice and neatly sorted.

Then you get a file from one of your customers. You open it and, of course, all the client’s fonts are missing – no font is active in the system.

No problem! Work with the “Install Font” script and activate all the fonts you need for the InDesign file! Whew, that was fast! 

Step 1:

Sort all fonts into customer or project folders

The script can’t help you with that ! 😁

Step 2:

Define the font folder in Octopus

With the button “Add list” you can add the customer and project folders to the script.

Now the script knows which fonts are in which folder for which customer or project.

Step 3:

Install fonts

If you have selected a “Fontlist” of a customer or project, you can see the fonts it contains in the lower part of the window.

Clicking on “Install Document-Fonts from current list” copies all fonts the document uses into the “document fonts” folder next to the open document!

Step 4:

Reopen document

The fonts in the Document fonts folder are only honored by InDesign when the file is opened. Therefore, the script suggests closing the file and opening it again. If it has been changed, the script will tell you that it must be saved.

Great, isn’t it?

Christoph Steffens presents

How does the scripts works?

FAQ:

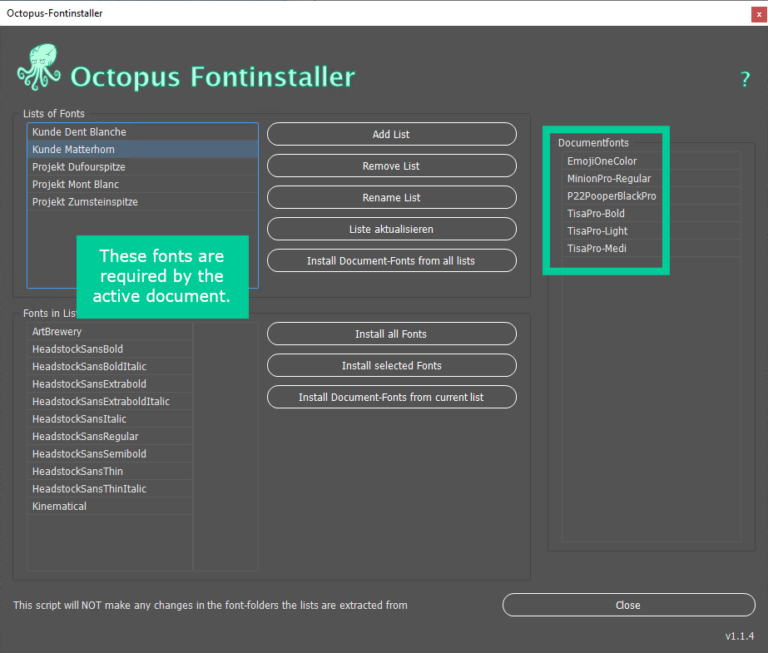
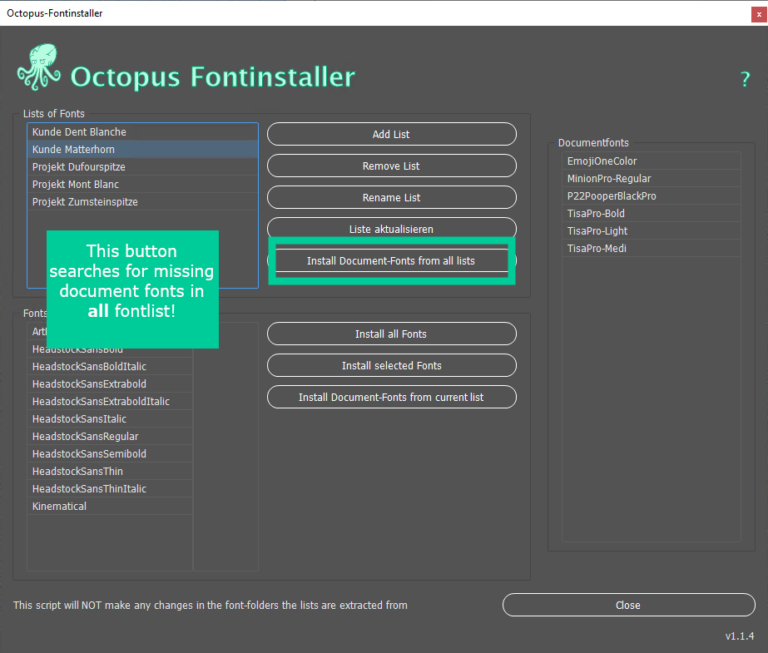
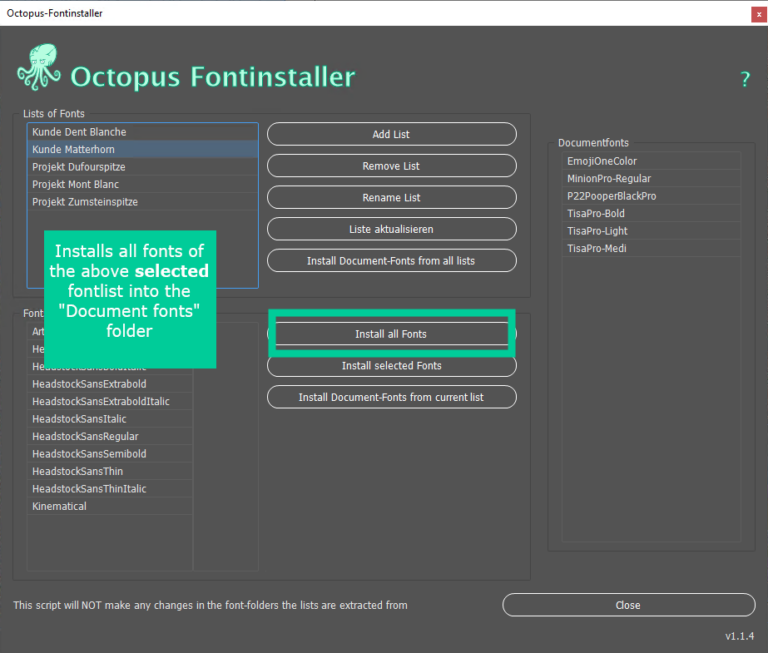
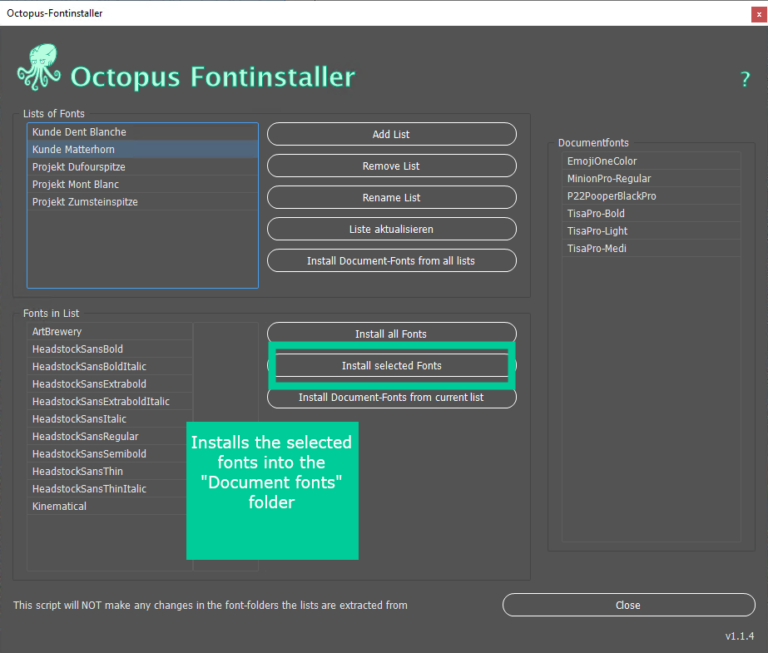
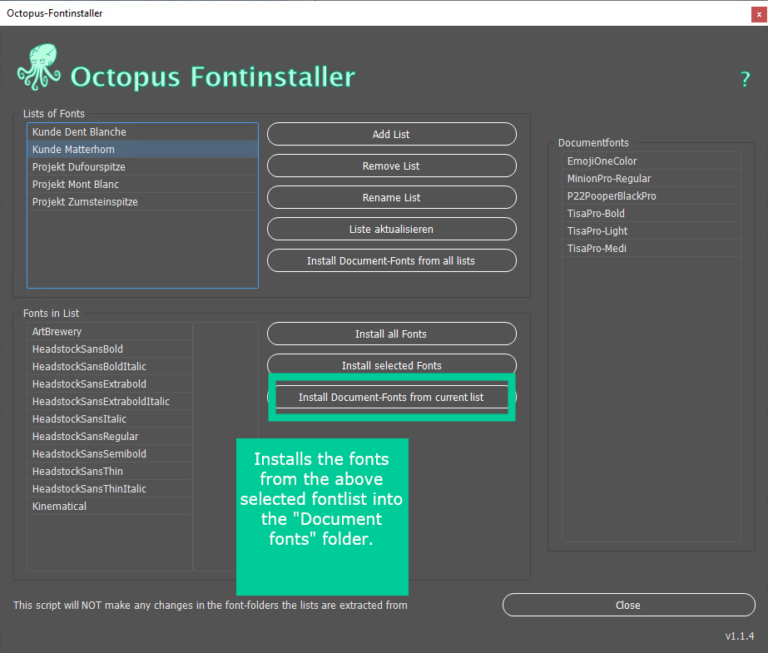
“Document fonts” are an invention of Adobe and therefore not an invention of the script “Install fonts”!

The idea is that a “document fonts” folder exists in the same directory as one or more InDesign files.

When a file is opened, InDesign checks to see if any missing fonts are in a folder of that name in the same directory. If this is the case, these fonts are activated for the document.

Attention: These fonts are only active for the documents that are located in the same directory, and not for other InDesign files!

You can also create such a folder yourself. But pay attention to the exact spelling: “Document fonts”.

True. If you need the fonts in Photoshop or Illustrator, the “Document fonts” folder won’t help you.

Well, that depends on how you want to work.

Yes, with the way the script works, fonts are copied and end up in multiple folders.

However, this way all fonts are in the correct folders. If you open an InDesign file years later, you have all the fonts needed for the project, you don’t have to gather them.

Take a look at the lists of the set font folders. Are there a lot of fonts included? Like, really a lot?

Then it may be because the script needs a moment to be opened.

The old Postscript fonts (also called PS1 fonts), are no longer supported in current versions of InDesign and Photoshop are no longer supported. Therefore Project-Octopus does not support them.

Adobe fonts (formerly Typekit) are also not supported by Project-Octopus. These are not managed in the system like other fonts.

Download the Octopus installer here:

WordPress Cookie Plugin by Real Cookie Banner